
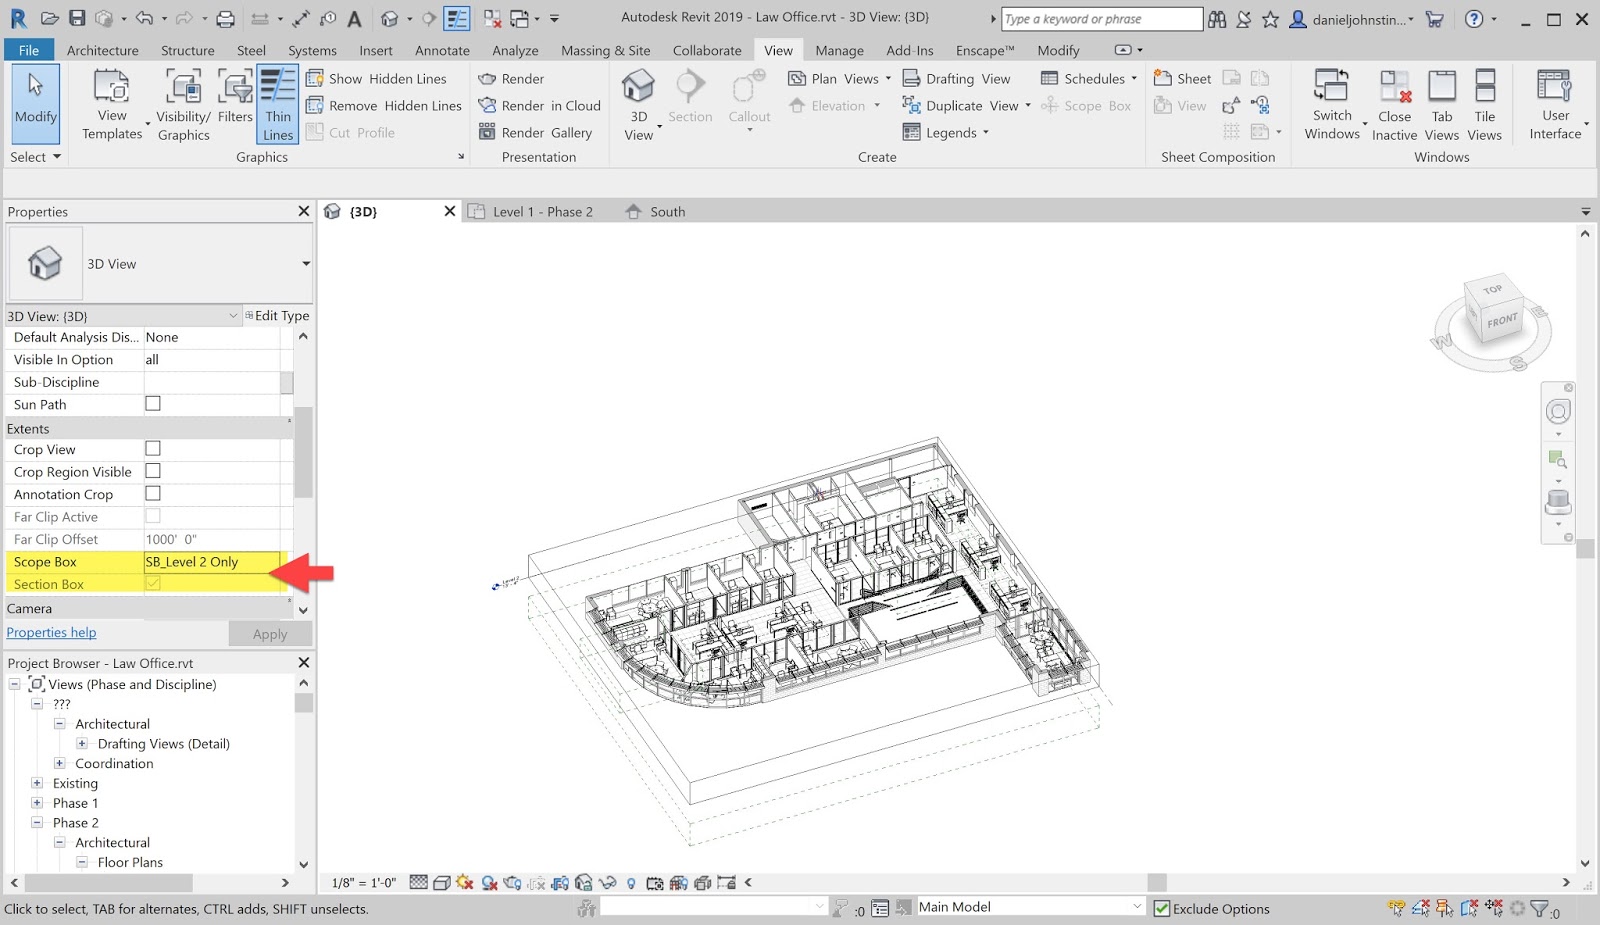
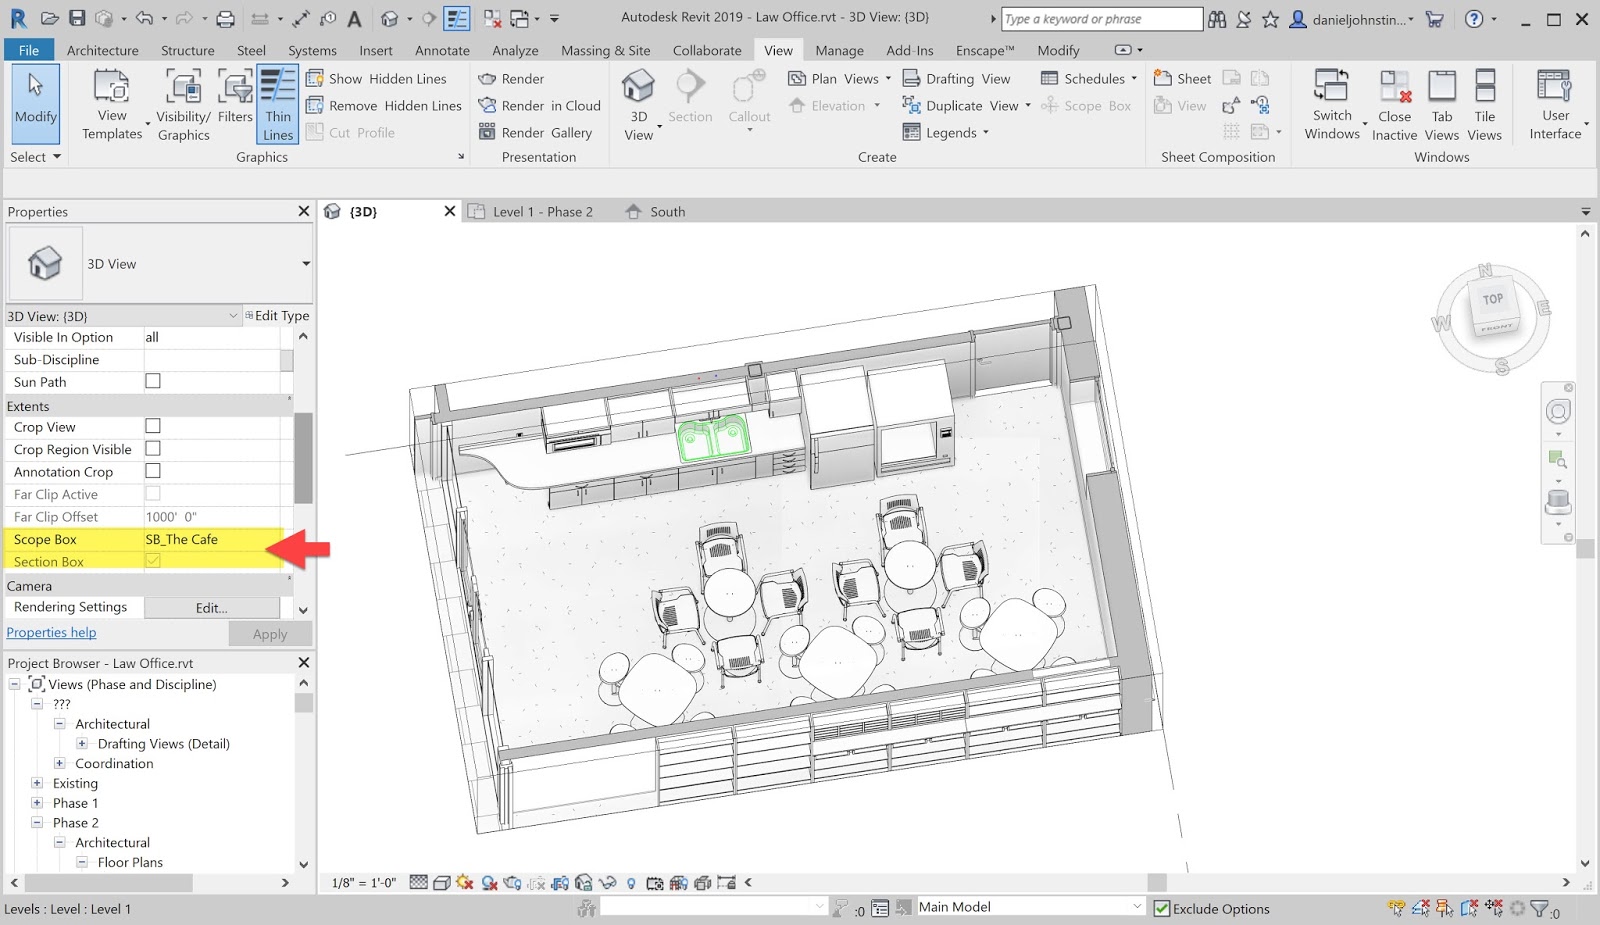
Revit 2019 now allows us to assign a Scope Box to 3D views. If you assign a Scope Box to plans to make them all match between sheets, you could also apply it to a 3D.
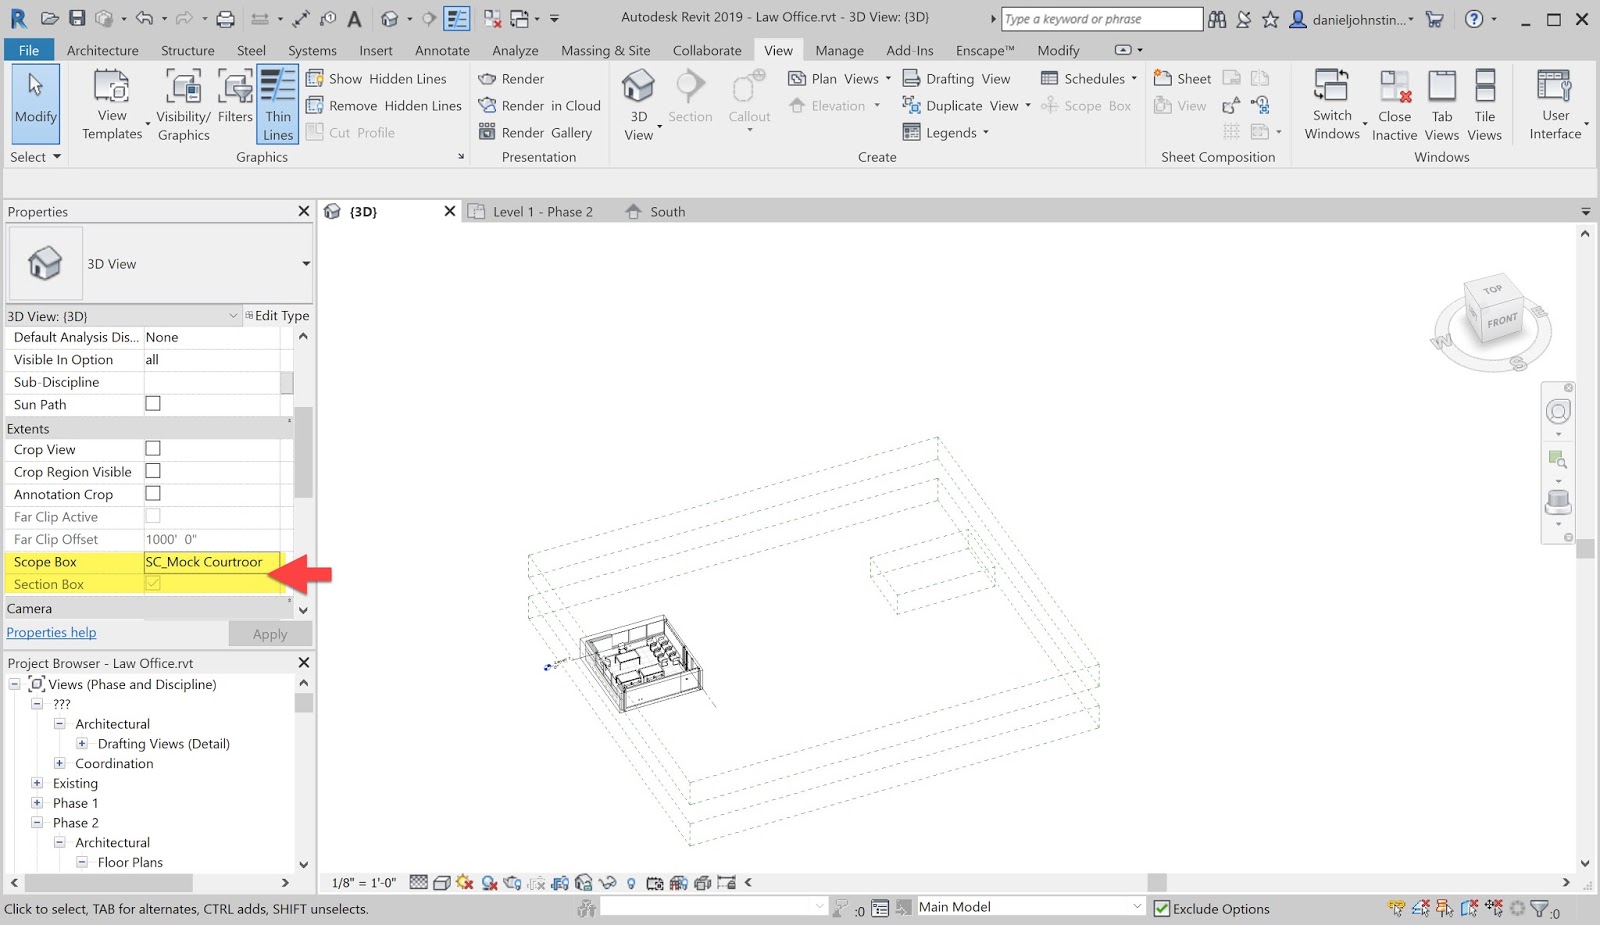
Another idea would be to also create special Scope Boxes as a sort of saved Section Box. When a Section Box is turned off in a view, Revit does not remember the previous extents when it is turned back on.
In the next four images (click to enlarge), I apply a different Scope Box to the same working/default view. Notice, I also added a common prefix to the Scope Box name to group them together and help others know what they are for.
 Additionally...


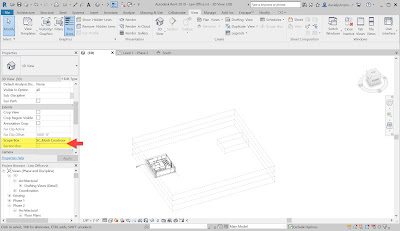
In this view I also turned of the Scope Box Category so the scope boxes are not visible, although they are still cropping the model.

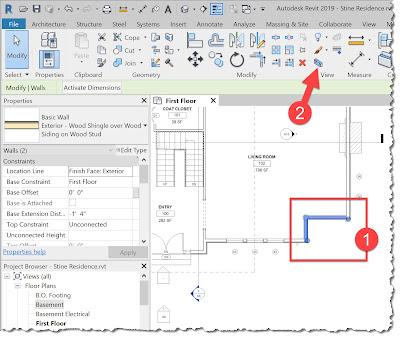
This new functionality has creating a bug-type situation. If you have a Scope Box applied to the Default 3D View, and then you use the Selection Box command, you run into an odd situation. Here is what I am talking about:
1) Scope Box applied to Default 3D View


For BIM Chapters updates, follow @DanStine_MN on Twitter
Another idea would be to also create special Scope Boxes as a sort of saved Section Box. When a Section Box is turned off in a view, Revit does not remember the previous extents when it is turned back on.
In the next four images (click to enlarge), I apply a different Scope Box to the same working/default view. Notice, I also added a common prefix to the Scope Box name to group them together and help others know what they are for.


In this view I also turned of the Scope Box Category so the scope boxes are not visible, although they are still cropping the model.
This new functionality has creating a bug-type situation. If you have a Scope Box applied to the Default 3D View, and then you use the Selection Box command, you run into an odd situation. Here is what I am talking about:

2) Select elements in a plan view and click the Selection Box command
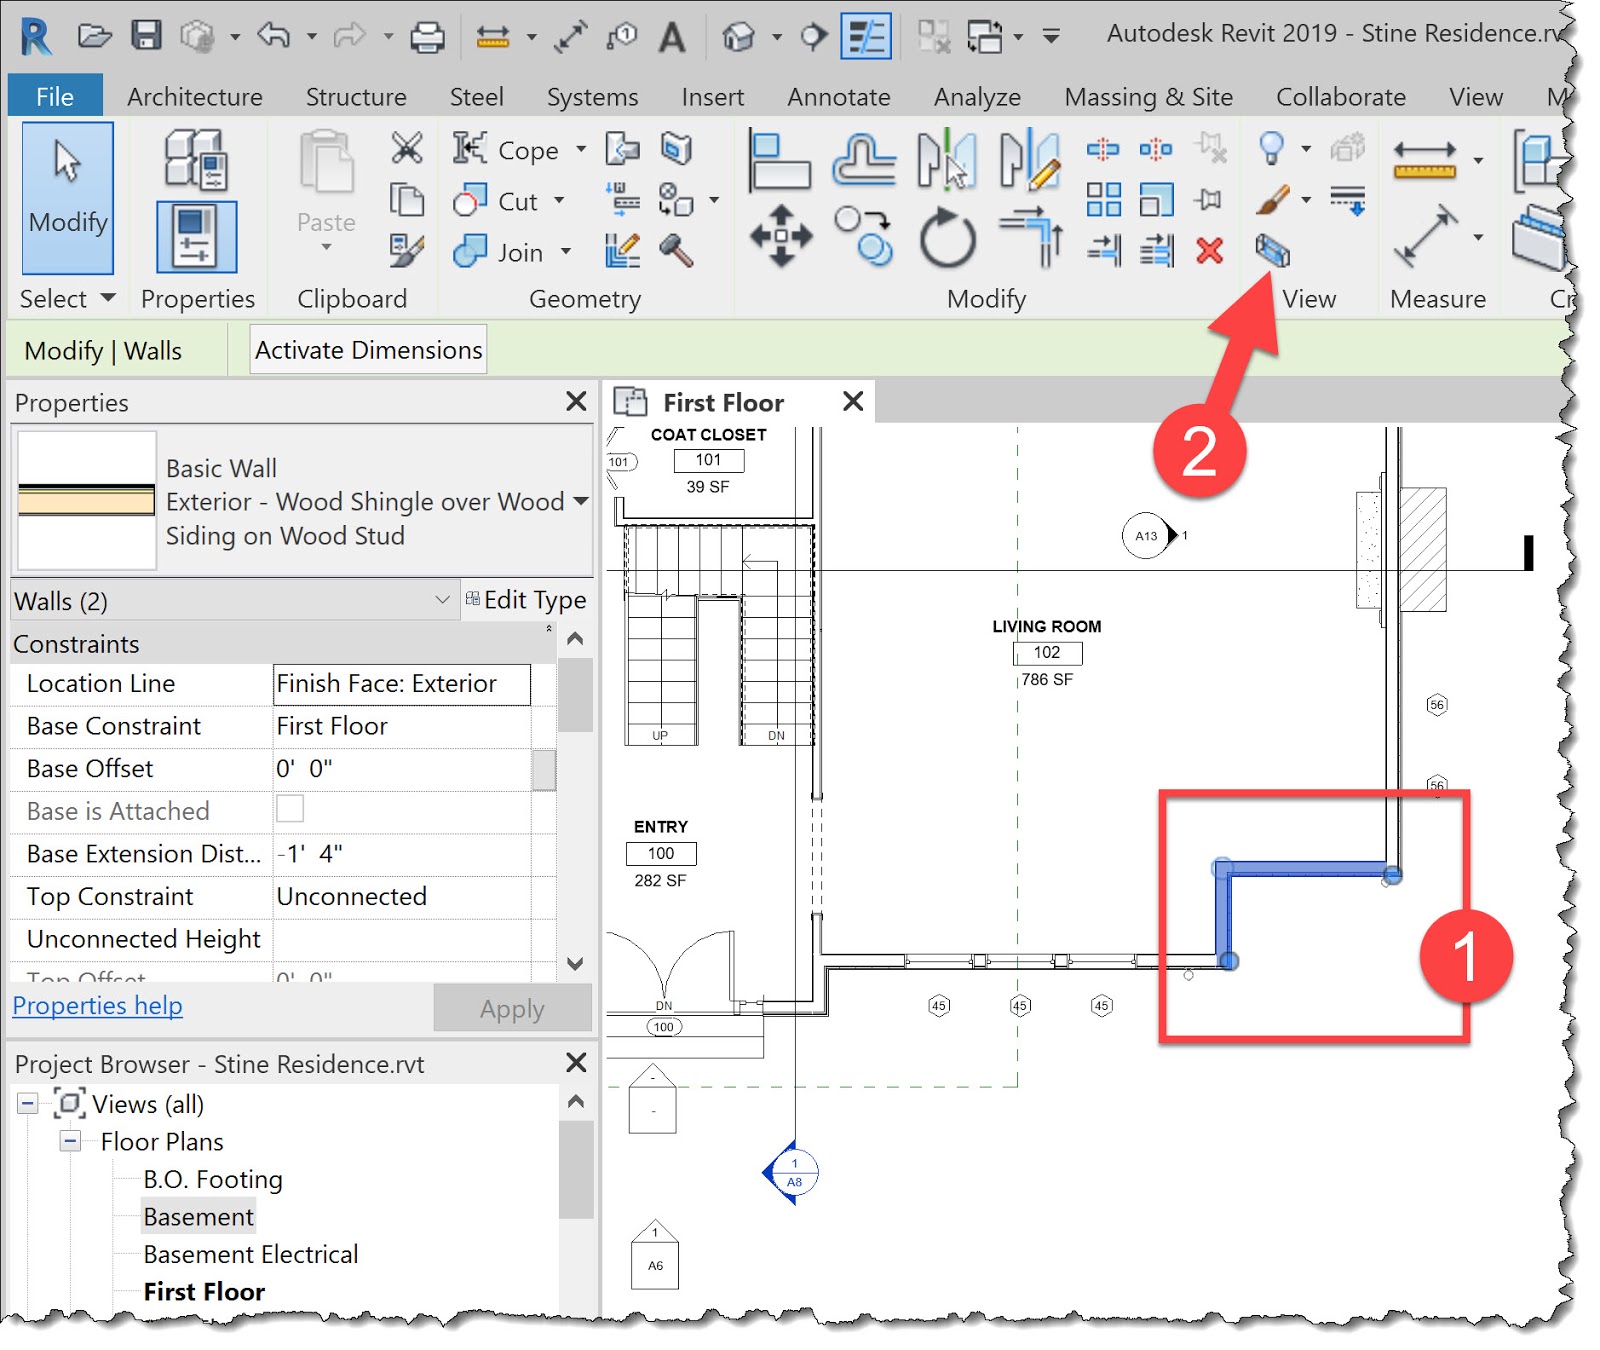
3) The result is a section box applied to the view that does not match the selected Scope Box. Plus, the situation in the Properties Palette makes things confusing... the Section Box is grayed out. You have to set the Scope Box to none (or another named Scope Box) and then back to something (if you want) or just start manually editing the Section Box toggle. I am sure this will be resolved in the near future.

For the big picture overview of new features in Revit 2019, be sure to see my annual AECbytes article: New Features in Revit 2019.
Fun stuff!
For BIM Chapters updates, follow @DanStine_MN on Twitter