

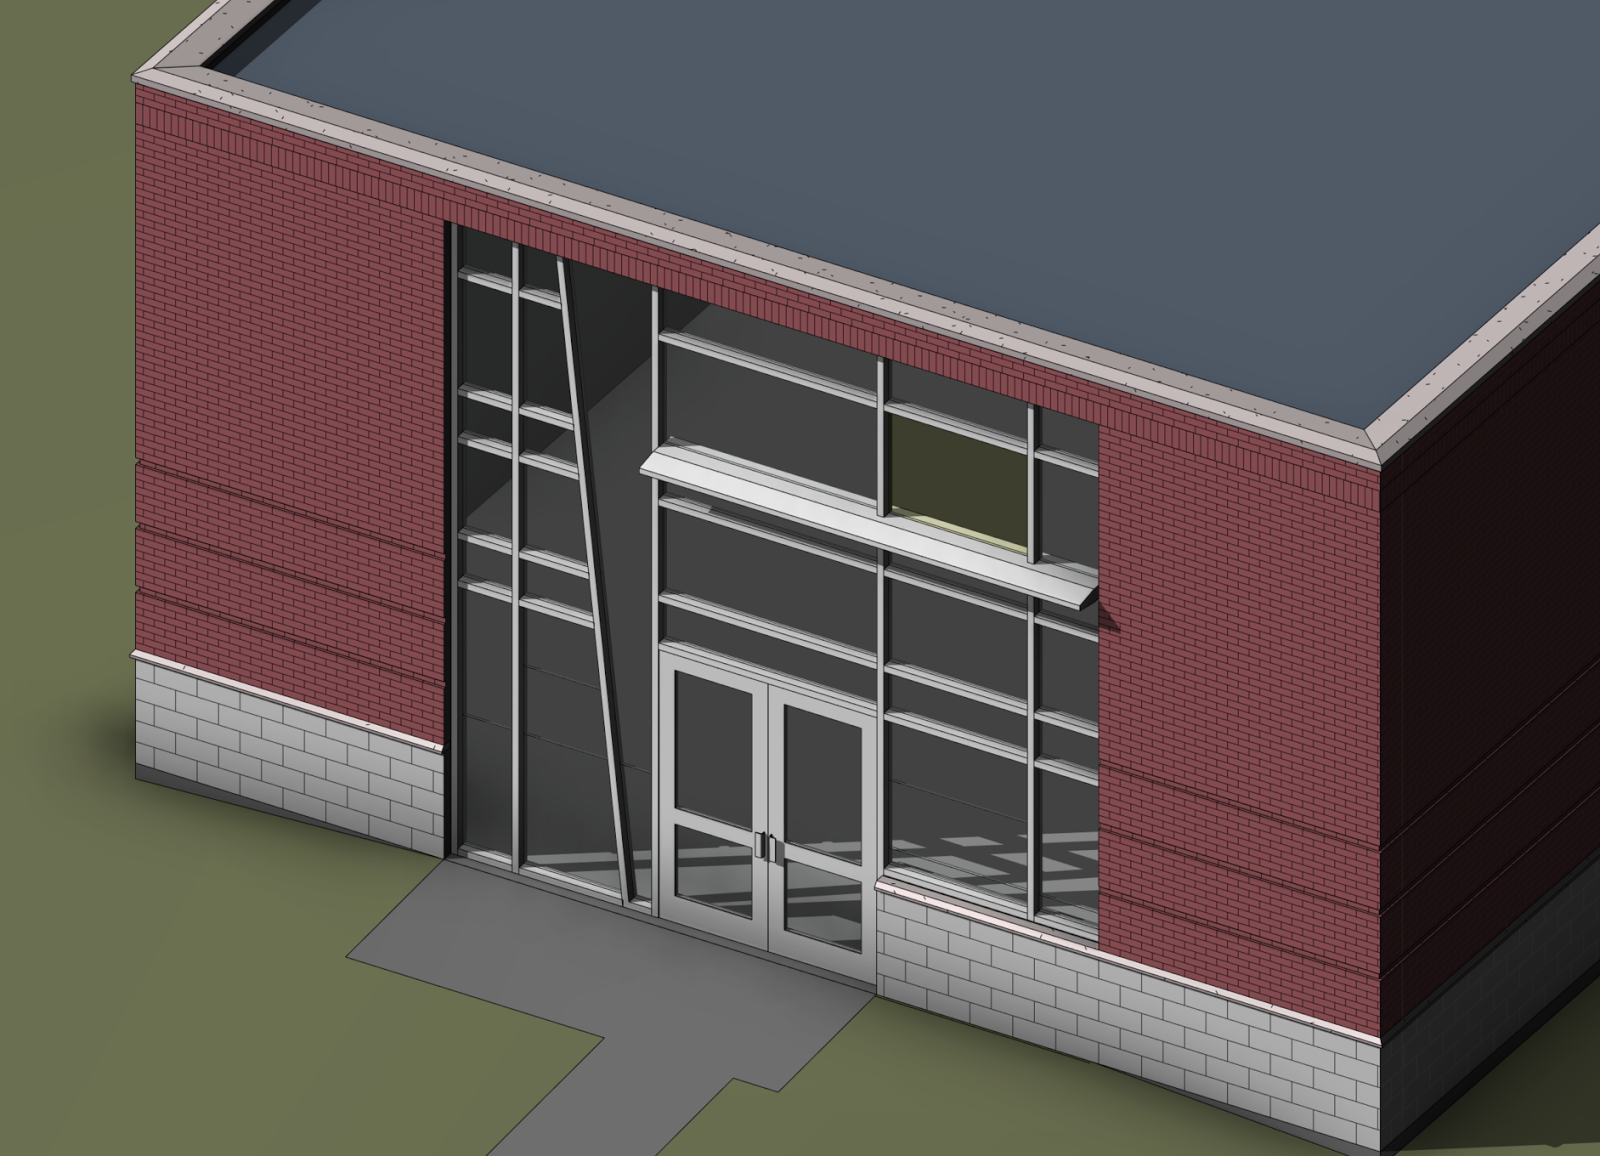
The first image below is a shaded view within Revit. Everything here was done with normal Revit commands. The curtainwall is represented by just curtainwall and no other loaded or in-place families. I added the walls, site, interior lighting, etc. just for this post.
This example features a sloped mullion, multiple curtain panels (two glazing colors and a door) as well as a custom mullion profile (the horizontal fin). The aluminum framing also steps up and over the low masonry wall on the right hand side.
Additionally...
The next several views are of the Revit model in Enscape. Notice they all have an HDR image (sky box) loaded for dramatic affect and nice reflections in the glass. This view is forced to be a two point perspective... which is nice for smaller elements or rooms; not ever rendering program can do this.

A quick adjustment in Enscape, and it is nighttime. I think, because I don't have an actual earth modeled, the sun from the other side of the earth is "leaking" though - based on the odd lighting on the back side of my model, maybe?

Also, notice the nice grass and reflections in the glass. BTW, I have heard a lot of people say they think the grass is a bit too shaggy. Plus, I find it appears (i.e. pokes) through the floor, within the building, if you don't have a Building Pad placed; which is not really needed for slab on grade conditions.

A few more cool images. Once you start messing with Enscape it is hard to stop!


Now for a few other quick tips related to curtainwall...
Each curtain wall Type has an Automatically Embed toggle. This will cut a hole in a regular wall, as in the brick wall example above. I have seen a lot of people manually cut a hole with the Edit Profile tool... that is not required.

If you want to manage curtain wall types and detailed elevations, one method is to use Design Options. Create a Design Option as shown in the image below. The primary Option will always be empty and thus nothing will ever show up in your model unless to tell it to.

Group the curtainwall and then insert a copy off to the side of your model. Select the new Group, and use the Add to Set command; add the selected elements to the secondary Design Option. Create an elevation view and set the secondary Design Option to be current (see image below). Now the curtain wall types only appear in this elevation view and nowhere else in the model.

If you edit the Group in the model, the group in the Design Option will update as well. This elevation can have all of the curtainwall types lined up next to each other.


This Design Option method is nice as it is "fail safe" in terms of geometry showing up in the model and Construction Documents. You also do not have to bend the rules and use phases, worksets or links to achieve the same results... each are less desirable in my opinion. For example:
- Phases create problems in the MEP model where they have to deal with Phase Mapping or they will have graphics issues.
- Worksets are not ideal for controlling visibility; which is essential what is happening here.
- Using links are to much work.
Finally, in Revit 2018 we can create parameters for groups and schedule groups. Unfortunately, you cannot tag groups.
My two cents... enjoy.