Fun fact: I wrote this post in-flight between
Minneapolis and
Amsterdam, in route to visit my family's past Russian exchange students--and ultimately posted this from
St. Petersburg, Russia. I had mentioned this impending trip
in a speaker spotlight interview for
BILT-NA in Toronto.
There are a number of tips and tricks related to Revit’s
Section Box feature. I will share several of them in this post. Please add any additional tips you may have in the comments section below.
A Section Box can be activated in a 3D or Camera view via
Properties as shown in the image below.
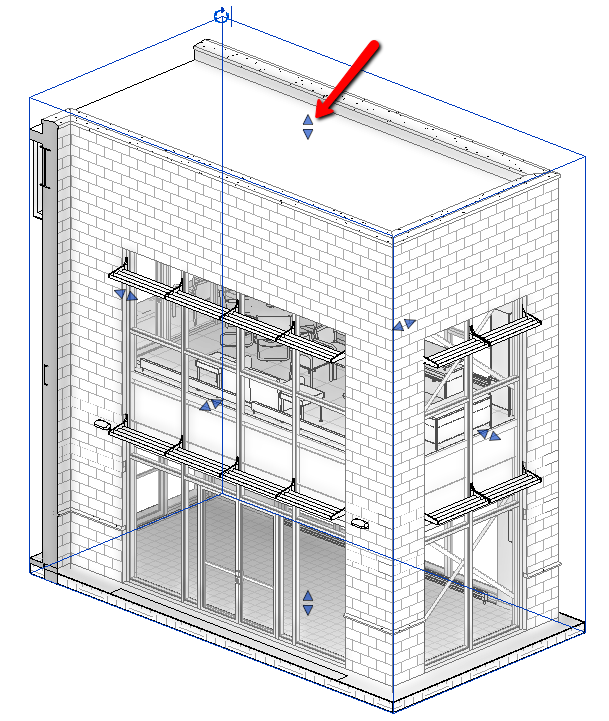
Once activated, and selected, each of the six sides of the
Section Box can be adjusted using the grips. The grips are always centered on
each face.
About those grips… they can be hard to find and tricky to
select. Knowing they are always in the center helps in locating them. If you
click and miss the grip, the Section Box deselects—which is a pain. Notice the
grip is composed of two arrows? If you single-click one side, or the other, the
Section Box face will adjust a slight amount in the direction selected.
In addition to the six grips, there is also a quick access
Rotation icon, see the image above.
For more control in sizing and rotating the Section Box, I
like to adjust it in plan, elevation and section views. You can make the
Section Box visible by selecting it in the 3D view and then using Ctrl+Tab to
step through the open views. This requires the plan or elevation view to
already be open. Additionally, the Section Box will become deselected if you
step into another project or family.
Another option is to open the plan or elevation view and then right-click on the 3D view in the Project Browser as shown in the image below.
Any 3D or Camera view with Section Box checked will show this option.
Once selected, you can drag a side to be more accurately
centered on a wall (in plan) or above/below a floor (in elevation).
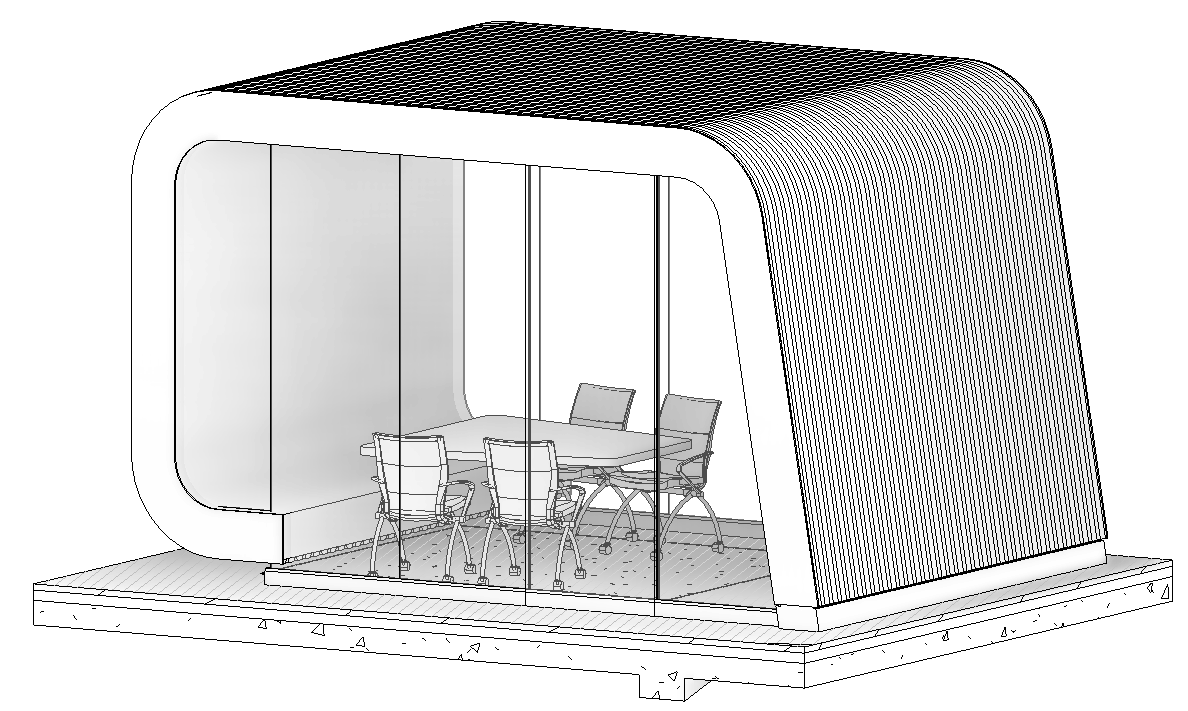
When the Section Box is selected, in a plan view, use the
rotate command. The angled element in the next two images is a good example of
when rotating a Section Box can be helpful.
In this example, the floor cut aligns with the element and
the adjacent columns are excluded.
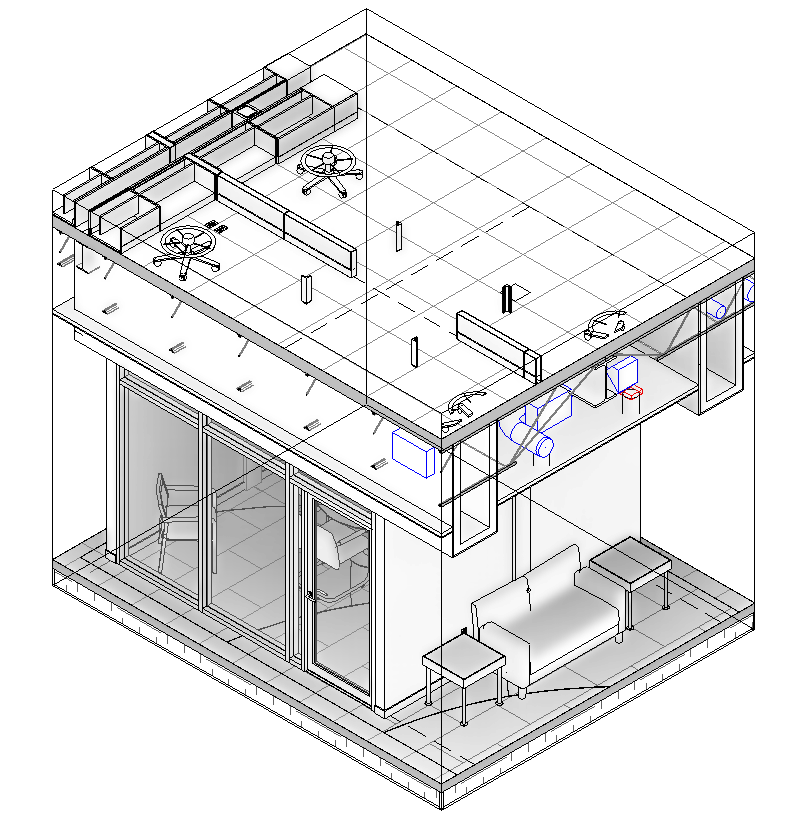
Another great way to leverage the Section Box tool is via
the
Selection Box command. Select one or more elements, as in the image below,
and then click the Selection Box command.
The result is your default 3D view is opened and the Section
Box is turned on and adjusted around the selected elements as shown in the next
image.
In general, I like to think of this as a “throw-away” Section
Box. Seeing as it is applied to the default 3D view, I am guessing that was the
developers intent as well. When done with this Section Box, just turn it off. A
view does not remember a previous position of an adjusted Section Box… thus,
whenever it is toggled back on, it will reset to align with the extents of the
model. If you want to save a Section Box adjustment, for future review, or to
place on a sheet, simply make a copy of the default 3D view.
Of course, the Section Box can be adjusted as
needed,,,
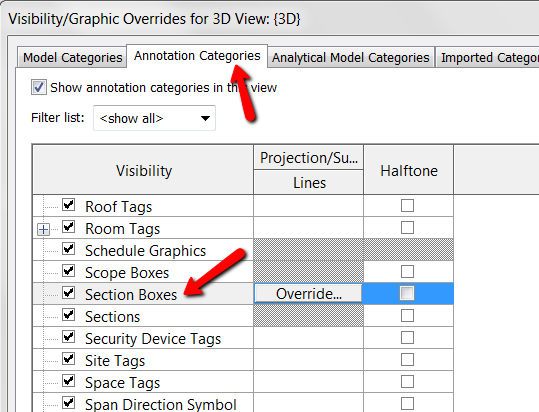
If the cropped view will be placed on a sheet you may want
to turn off the Section Box visibility via Visibility/Graphics Overrides.
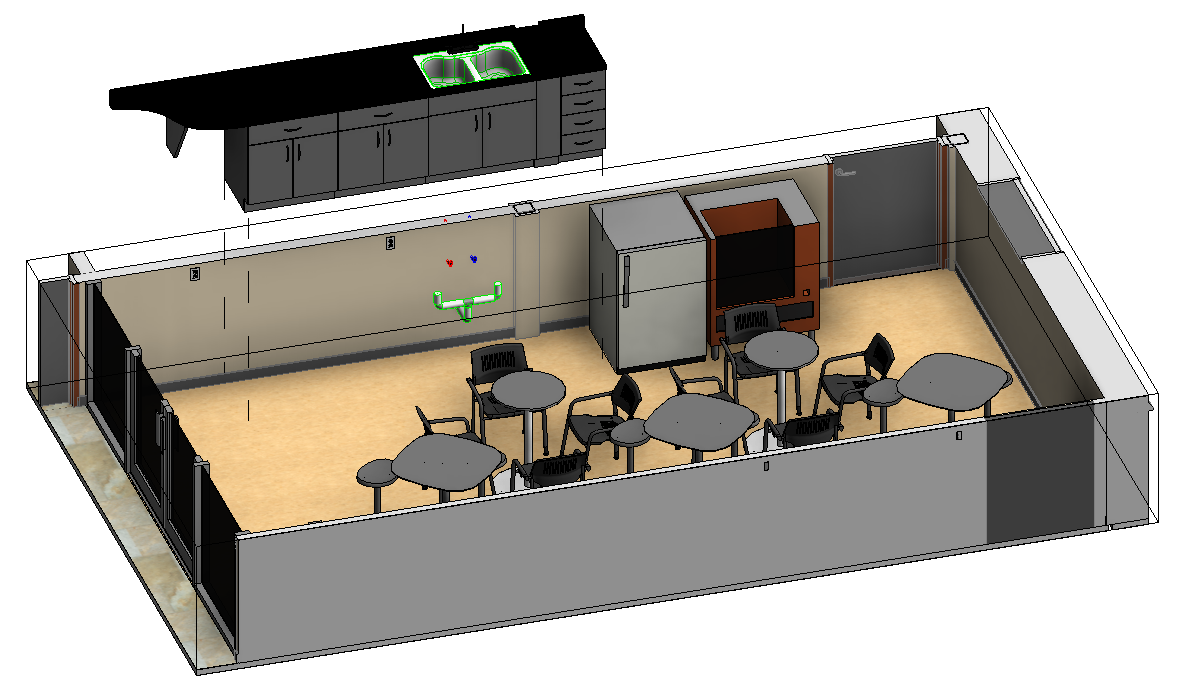
As long as the original element(s) is within the Section Box,
it is possible to use the
Displace Elements command to preposition items outside of the
Section Box as shown in the image below.